Wednesday, June 28, 2023
Easy & fast fly screen solution for German (European?)-style windows
After recently receiving a 3D printer for my birthday and dipping my toes into CAD I was looking for ways to use the printer to simplify various upcoming tasks in and around our house.
I had built my own custom cheap fly screens for a previous rented apartment which was very tedious work as the design did rely on the frames needing to fit snugly inside the window frames as the most important constraint was not to modify the existing windowsframes in any way, resulting in taking very long for each screen.
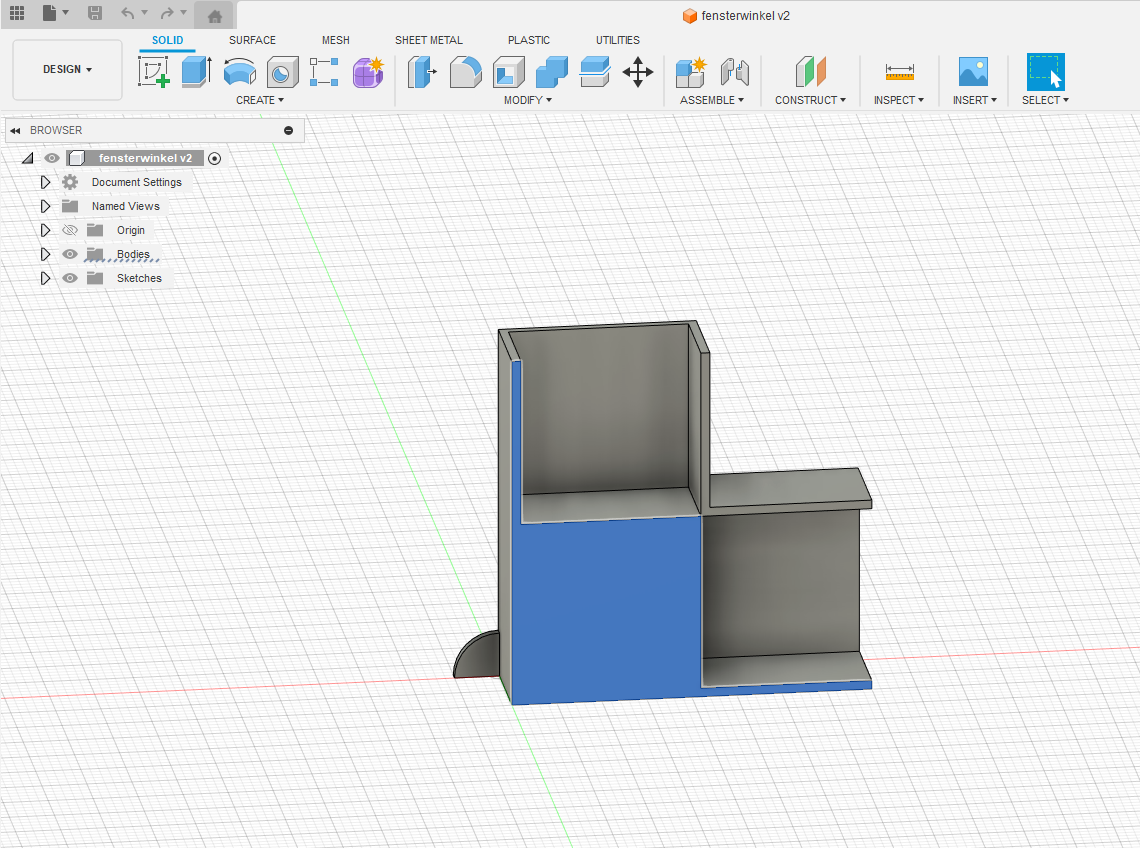
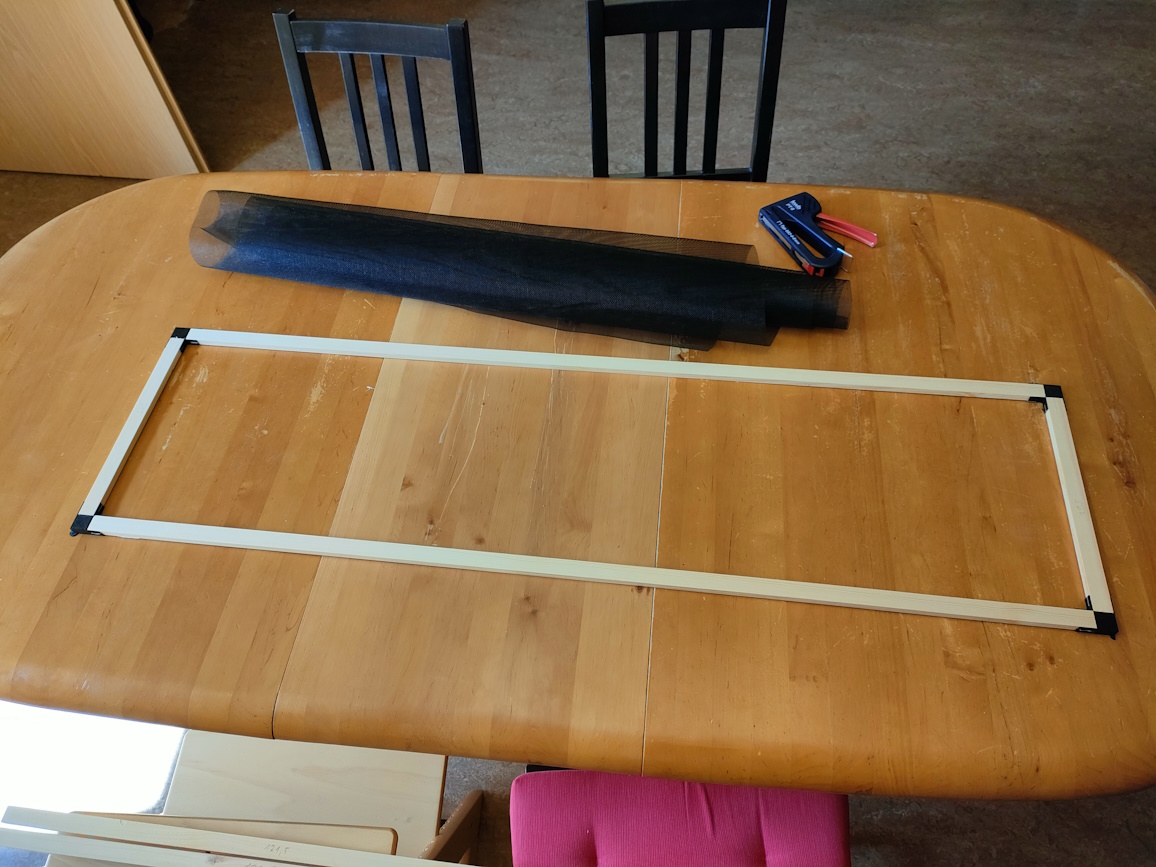
I thought about making the process easier by not having to do miter cuts and instead 3D printing angular pieces for the corners, also giving some room for the four-by-twos as they could be moved within reason in the angular pieces before being locked into place with a carpet stapler.
I came up with this design having a small tab in the corner to prevent the frame from falling out the window.
Expensive commercial solutions require drilled holes in the window frames and the screens have spring loaded metal pins usually.
The bottom two pieces have a cut-off tab due to the specific design of my windows and they accept a 20×10mm “two-by-four”.
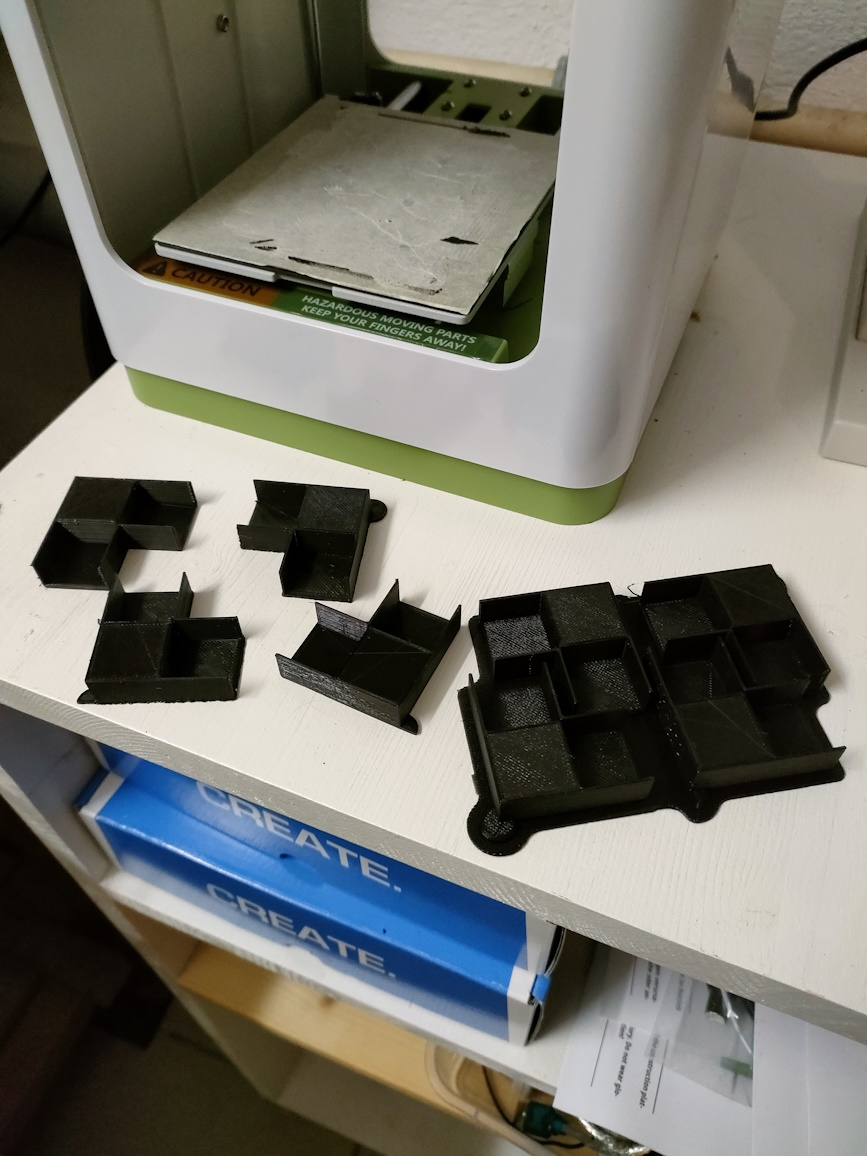
The pieces can all be printed at once in my rather small 3D printer:
The whole assembly process takes around 10 minutes after cutting the two by fours, which including taking measurements actually is the most time consuming part.
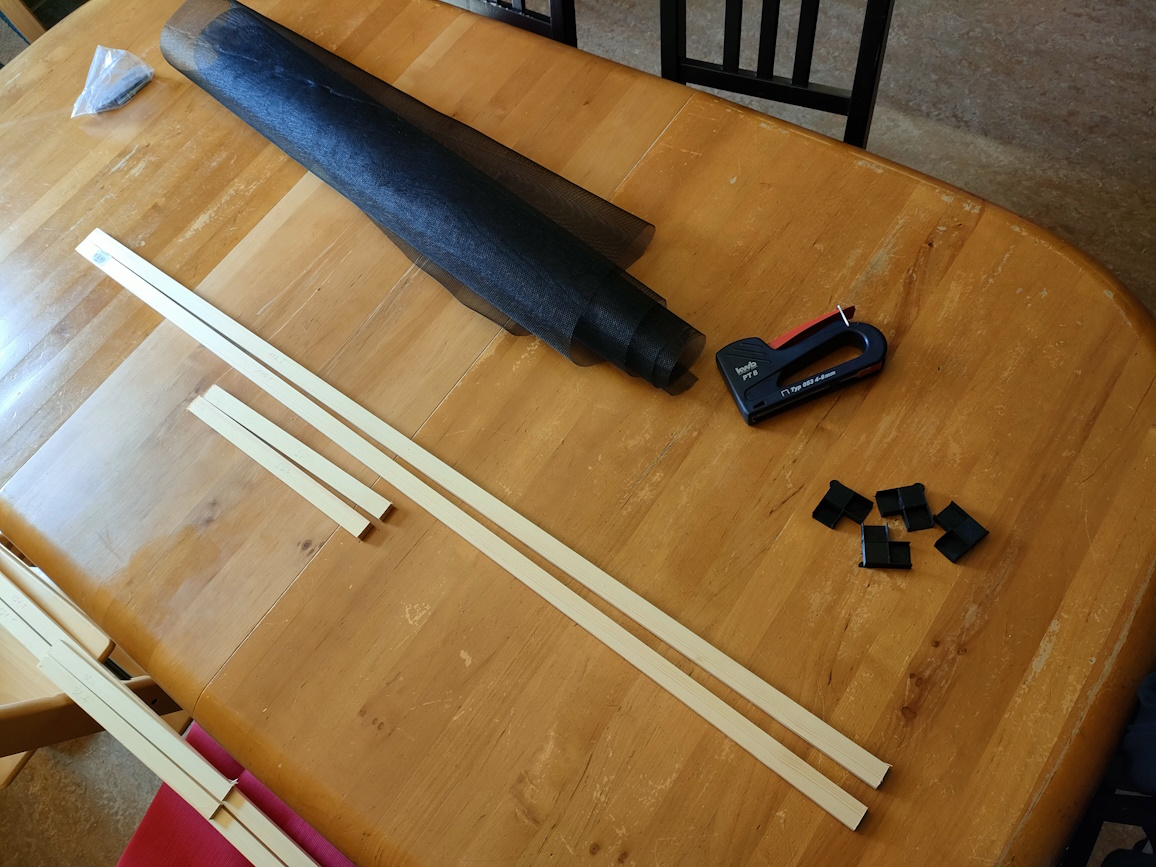
The two-by-fours are cut minus 2x the additional width introduced by the 3D part (2x 2cm) and ideally with a little undersize.
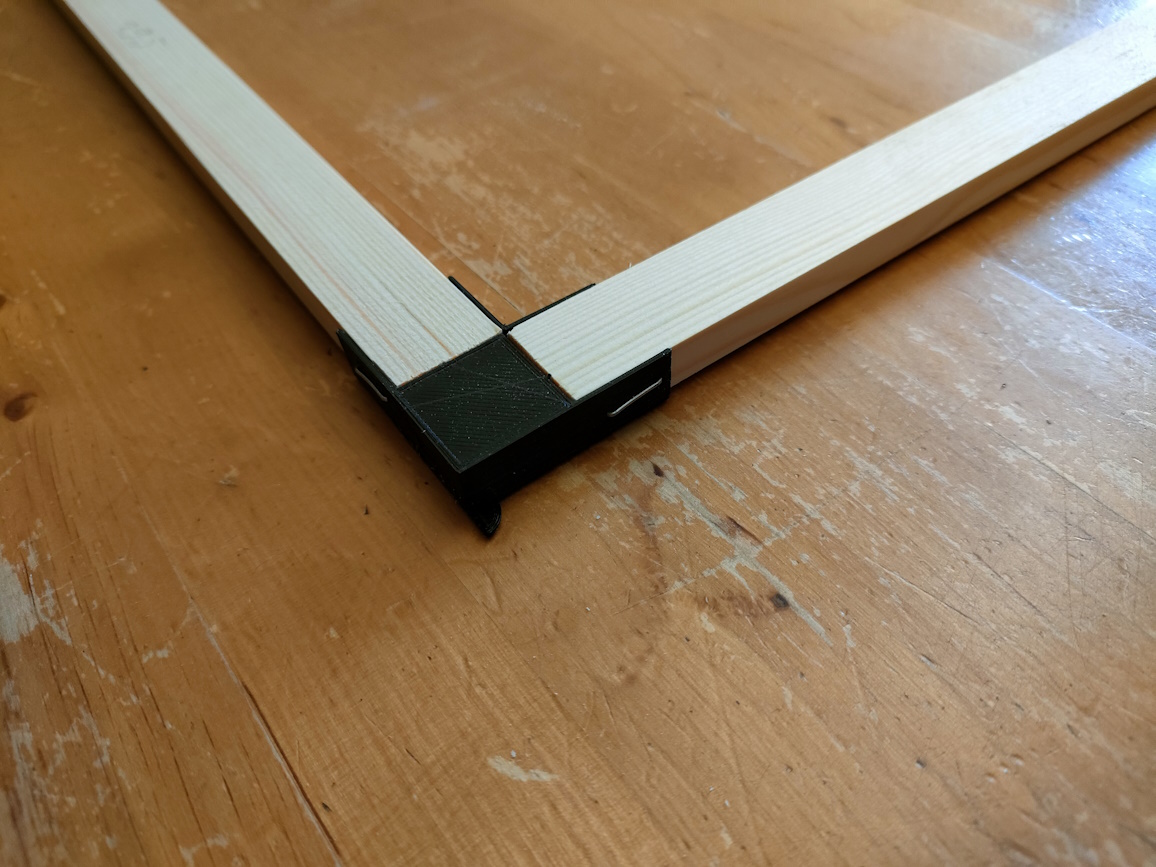
After putting the frame together it can be placed in the window and adjusted before using the carpet stapler on the inside junctions to fix it in place.
Then it can be taken out and placed on a flat surface to pop the outer staples in.
Next step is to align the screen mesh itself. I like to use the more expensive but durable “fiberglass fly screen mesh” you can buy.
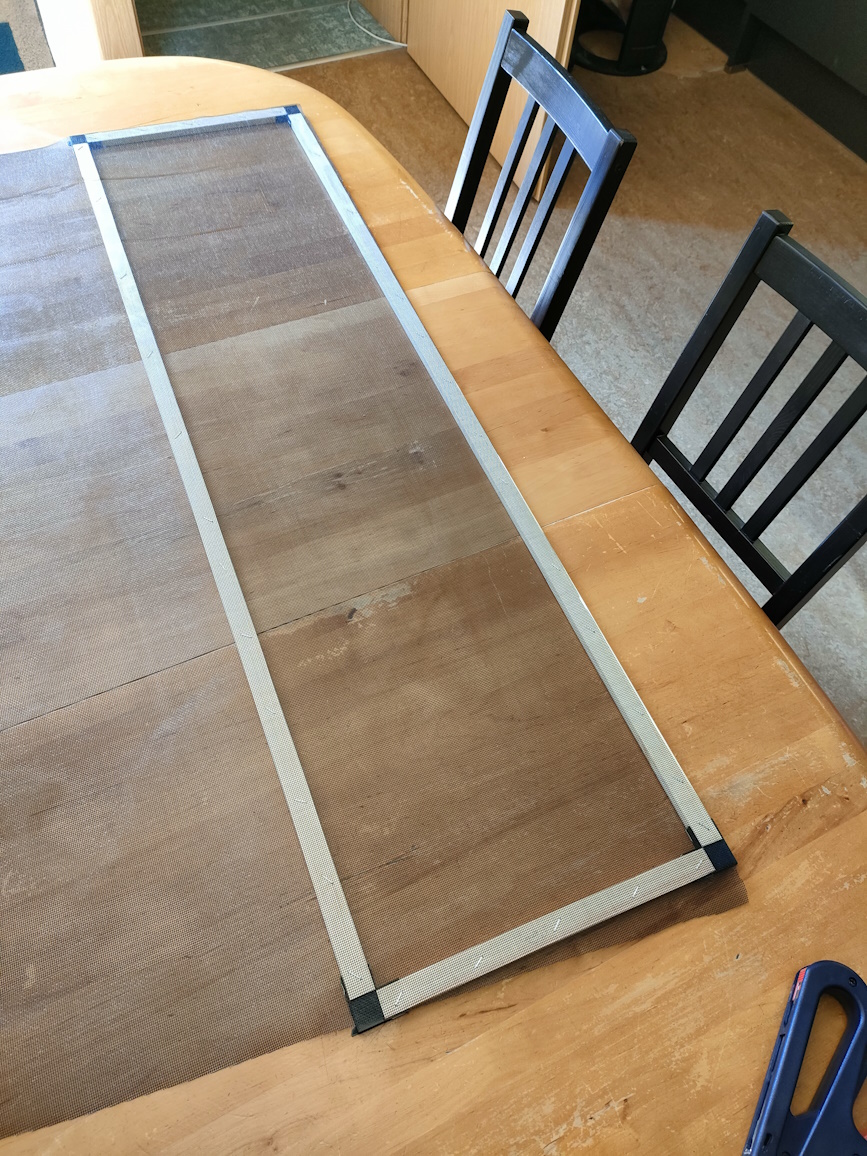
Cut off any excess fly screen material after stapling them to the outside portion of the frame (far side of the tab ears).
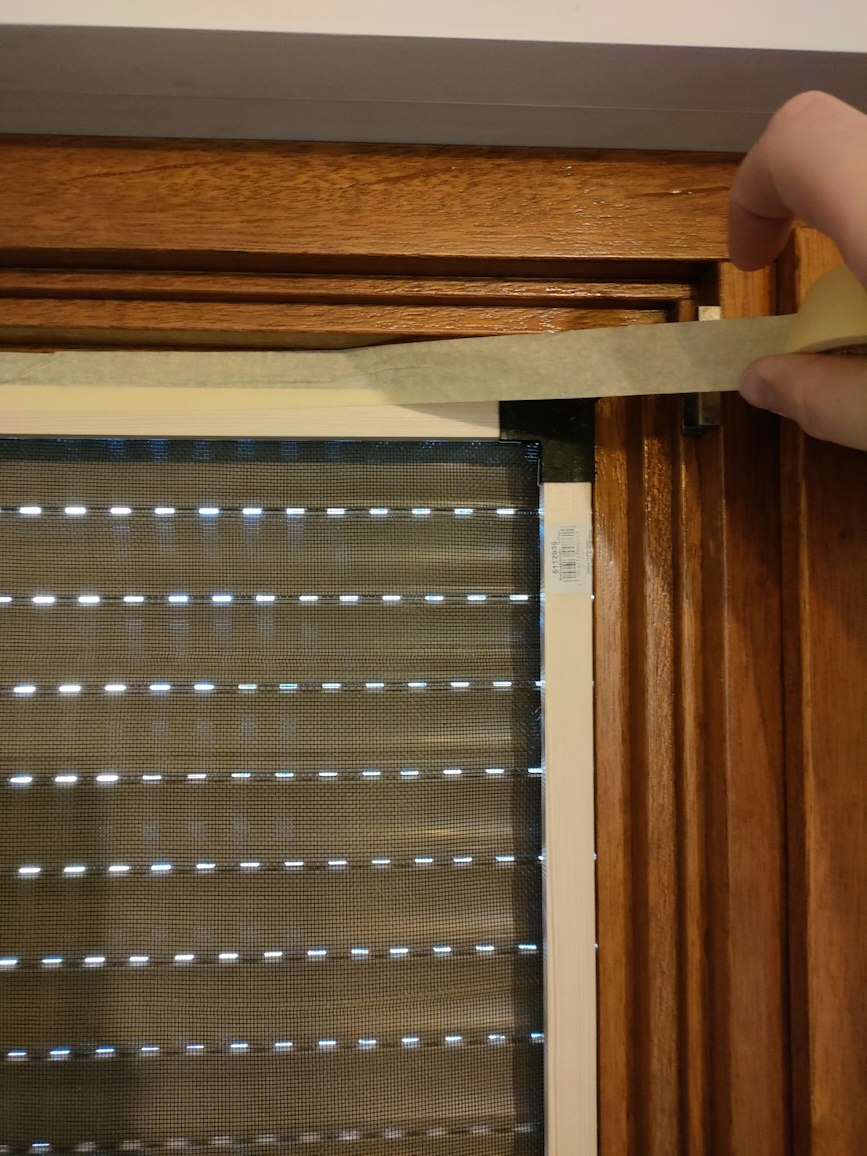
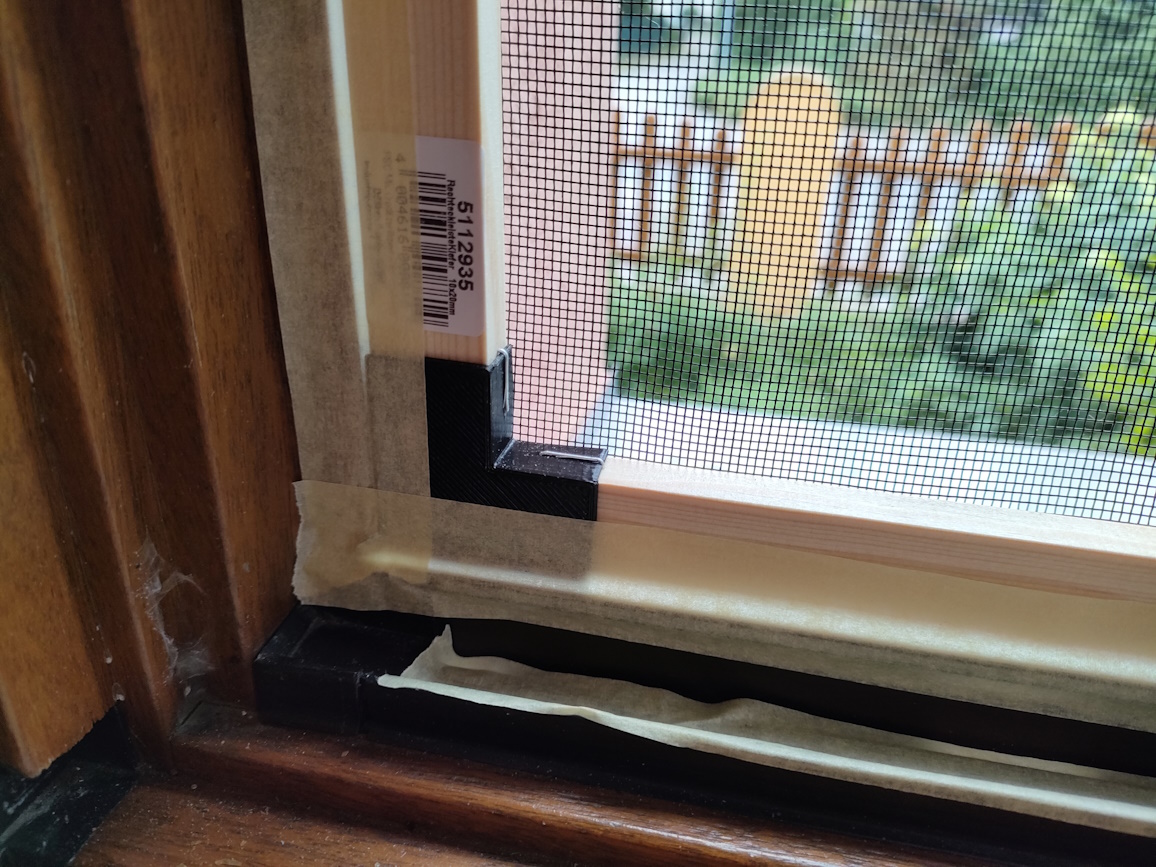
Last step after inserting them snugly into the window is to seal of the edges with masking tape (or “painters tape”).
Commercial frames have brushes along the corners, but the tape is a much cheaper but also feasable solution as it compensates heat-related changes throughout the day pretty good as well.
The cost for a 120 x 85 cm window is roughly around 18 € that way.
Meanwhile I have equipped 5 windows of various sizes.